This is another updated recipe from the early days of the channel. I’ve been on a roll with the updates lately, and there are a few good recipes left to do. As you may already know, I am pretty much against kneading nowadays and cold fermentation is my preferred fermentation method.
The old version of this recipe required a pre-ferment, autolyse, and kneading. All of which are redundant in my opinion. A long cold bulk fermentation replaces both the pre-ferment and the autolyse. And kneading is replaced by a single fold 30 minutes after the dough has been mixed.
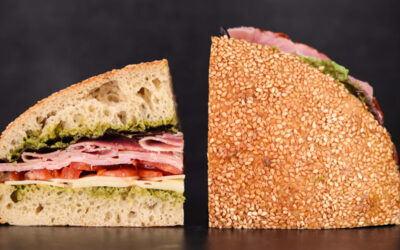
While to loaf may look like a technically challenging bake, it is in fact very basic and extremely easy to pull off. It’s a lean dough with a hydration of 70%, so it is easy to handle. Since it is a ciabatta style bread it requires no shaping as the final shaping step consists of nothing more than trimming off the edges.
You can double the recipe and make two loaves or cut them smaller to make more. The process will still be the same. The only difference will be that there will be fewer trimmings, but that’s not a problem.
If you want to adjust the flavour, colour, and texture of the bread, then you can substitute some whole wheat or even rye. Just be sure to increase the hydration a bit.
Watch the video down below for detailed instructions.
Ingredients
For the dough –
175g (6.2oz) water
2.5g (0.09oz) instant dry yeast or 3g (0.1oz) active dry yeast or 7.5g (0.26oz) fresh yeast
5g (0.17oz) salt
250g (8.8oz) white bread flour
To learn more about no-knead bread dough temperature control click here.
The flour I use has a protein content of 13%. If your flour is weaker, then you may need to lower the hydration.
If you are using active dry yeast, then you may need to let it sit in the water for 10 minutes before adding the other ingredients or else it could take a lot longer to raise the dough.
Method
- Dissolve the salt and yeast in the water. Add the flour and mix to a dough. *Desired dough temperature around 24C (75F).
- Cover and refrigerate for 30 minutes.
- Fold the dough.
- Place it back into the fridge and cold ferment it for 18 – 24 hours.
- Pre-shape, cover, and let it rest for 30 minutes.
- Trim to size. Place the scraps on a piece of baking paper and place the loaf on top of the scraps.
- Proof for 1 hour.
- Slash the loaf, spray it with water and place it in the oven.
- Bake at 220C (430F) fan on or 240C (465F) fan off for 20 minutes or until you’re happy with the colour of the curst. For the Batard baked in a covered vessel go for 20 minutes with the lid on and an additional 10 minutes after removing the lid.
Keep in mind that the conditions in each kitchen are different, so fermentation times may vary for you. It is up to the baker to control the bread and react accordingly.
Your oven may be different too, so your baking time may vary.